Vidu API Guide: MoE Model & Q-Series Access
Access Vidu MoE, Q3 Pro, and Q3 Turbo through one APIMart key. Compare the models, pricing from $0.048/sec, and the async API flow for text and image-to-video.
If I had to sum it up in one line: use Vidu MoE for harder prompt logic, use Q3 Pro for final output, and use Q3 Turbo for lower-cost testing through one APIMart setup.
Here’s the short version you can act on right away:
- I can access Vidu MoE, Vidu Q3 Pro, and Vidu Q3 Turbo through APIMart with one API key and one main request flow.
- The core endpoint is
POST https://api.apimart.ai/v1/videos/generations. - Video jobs are async, so I get a
task_idfirst, then I pollGET /v1/tasks/{task_id}or usecallback_url. - Vidu supports:
- text-to-video
- image-to-video
- reference-based video
- first-last frame transitions
- Q3 models add built-in audio like dialogue, sound effects, and music.
- Clips can run up to 16 seconds, with 540p, 720p, or 1080p output.
- APIMart pricing in the article lists:
- Q3 Pro: about $0.12/sec at 720p
- Q3 Turbo: about $0.048/sec at 720p
- Output links expire after 24 hours, so I should download files soon after success.
Quick comparison
| Model | Best use | Main upside | Main tradeoff | Price in article |
|---|---|---|---|---|
| Vidu MoE | Harder multi-scene prompts | Better prompt control and scene logic | Slower and higher cost | Premium |
| Vidu Q3 Pro | Final videos | Higher-quality output, 1080p, audio-video sync | Costs more than Turbo | $0.12/sec |
| Vidu Q3 Turbo | Tests, drafts, batch work | Lower cost and lower wait time | Less visual detail than Pro | $0.048/sec |
What stands out to me is how simple the switch is: in most cases, I just change the model field and keep the rest of the setup the same. That makes the article less about setup work and more about picking the right model for cost, wait time, and output quality.
Vidu Models Explained: MoE vs. Q-Series
Vidu's MoE model: what it is and when to use it
The MoE (Mixture of Experts) model sends different parts of a generation task to specialized experts for motion, scene consistency, and prompt control. It makes the most sense for multi-scene or longer prompts where consistency matters more than raw speed.
There’s a catch, though. MoE takes more compute and has slower turnaround than the Q-Series [7]. For simple prompts, it’s often more than you need.
Vidu Q-Series and Vidu Q3 Pro: performance for production use
If MoE is the specialist, Q-Series is the option built for production work. Vidu Q3 Pro is designed for polished cinematic output and storyboard-driven videos [7]. It supports 1080p video, clips up to 16 seconds, and audio-video generation with synchronized dialogue and sound effects [1][2][4]. On APIMart, Q3 Pro starts at $0.12 per second [2][3].
Vidu Q3 Turbo leans more toward speed and lower cost, with faster scene switching [6][7]. On APIMart, Q3 Turbo starts at $0.048 per second [3].
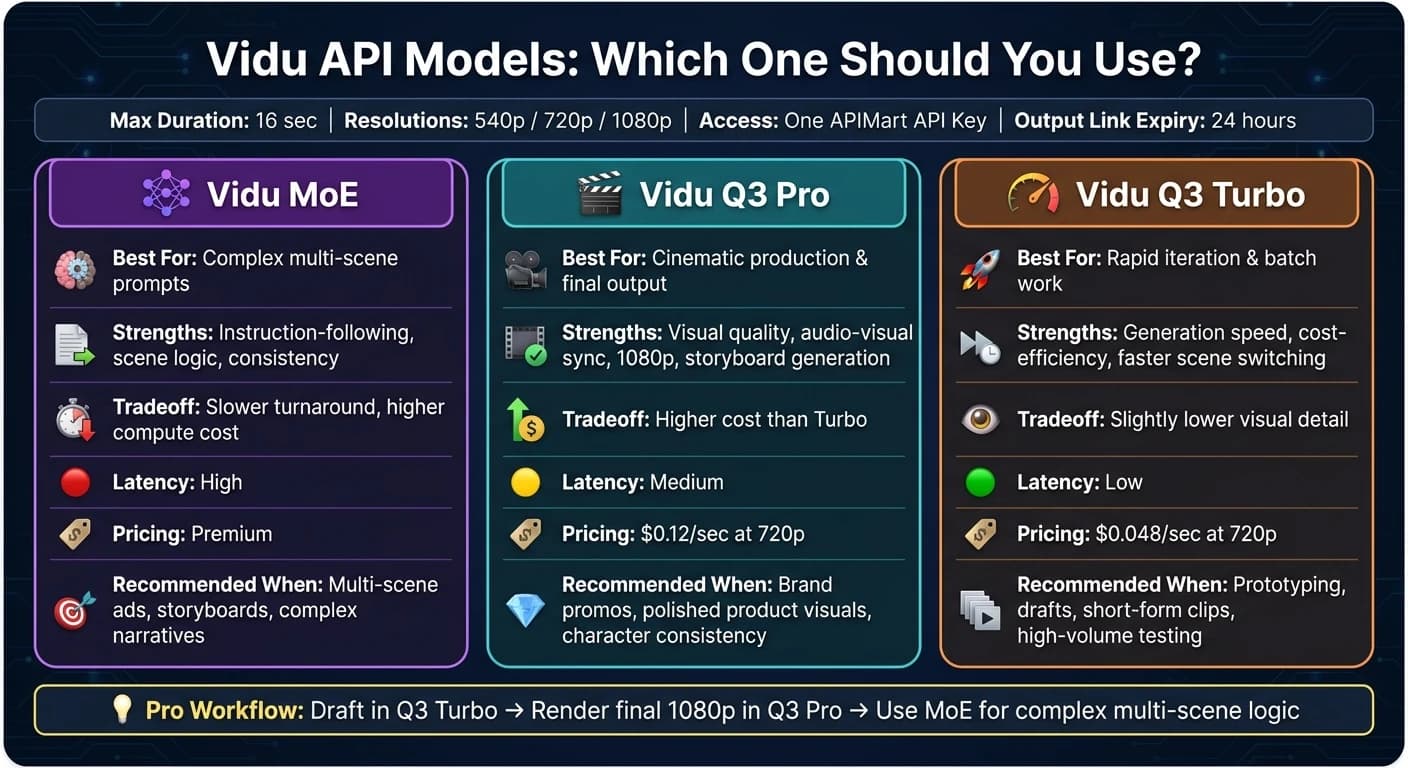
How to choose between MoE and Q-Series for your workflow
This choice mostly comes down to prompt complexity, turnaround time, and budget. If your workflow depends on strict instruction-following and multi-scene logic, go with MoE. If you need polished output with audio-visual sync, Q3 Pro is the better fit. Alternatively, Kling V3 provides another high-fidelity option for cinematic AI video. If your main goal is fast iteration or lower cost per clip, Q3 Turbo is the practical pick.
The table below maps each model to the kind of work it handles best. For those comparing high-end options, Sora 2 offers similar cinematic capabilities with synchronized audio.
| Model | Best For | Strengths | Tradeoffs | Latency | Pricing (USD/sec) |
|---|---|---|---|---|---|
| Vidu MoE | Complex multi-scene narratives | Instruction-following, scene logic, consistency | Higher compute cost, slower turnaround | High | Premium |
| Vidu Q3 Pro | Cinematic production | Visual quality, audio-visual sync, storyboard generation | Higher cost than Turbo | Medium | $0.12 [2] |
| Vidu Q3 Turbo | Rapid iteration & batching | Generation speed, cost-efficiency, faster scene switching | Slightly lower visual detail | Low | $0.048 [3] |
Next, see how to select a model, authenticate, and send the request through APIMart.
How to Access Vidu Through APIMart
Account setup, authentication, and API key handling
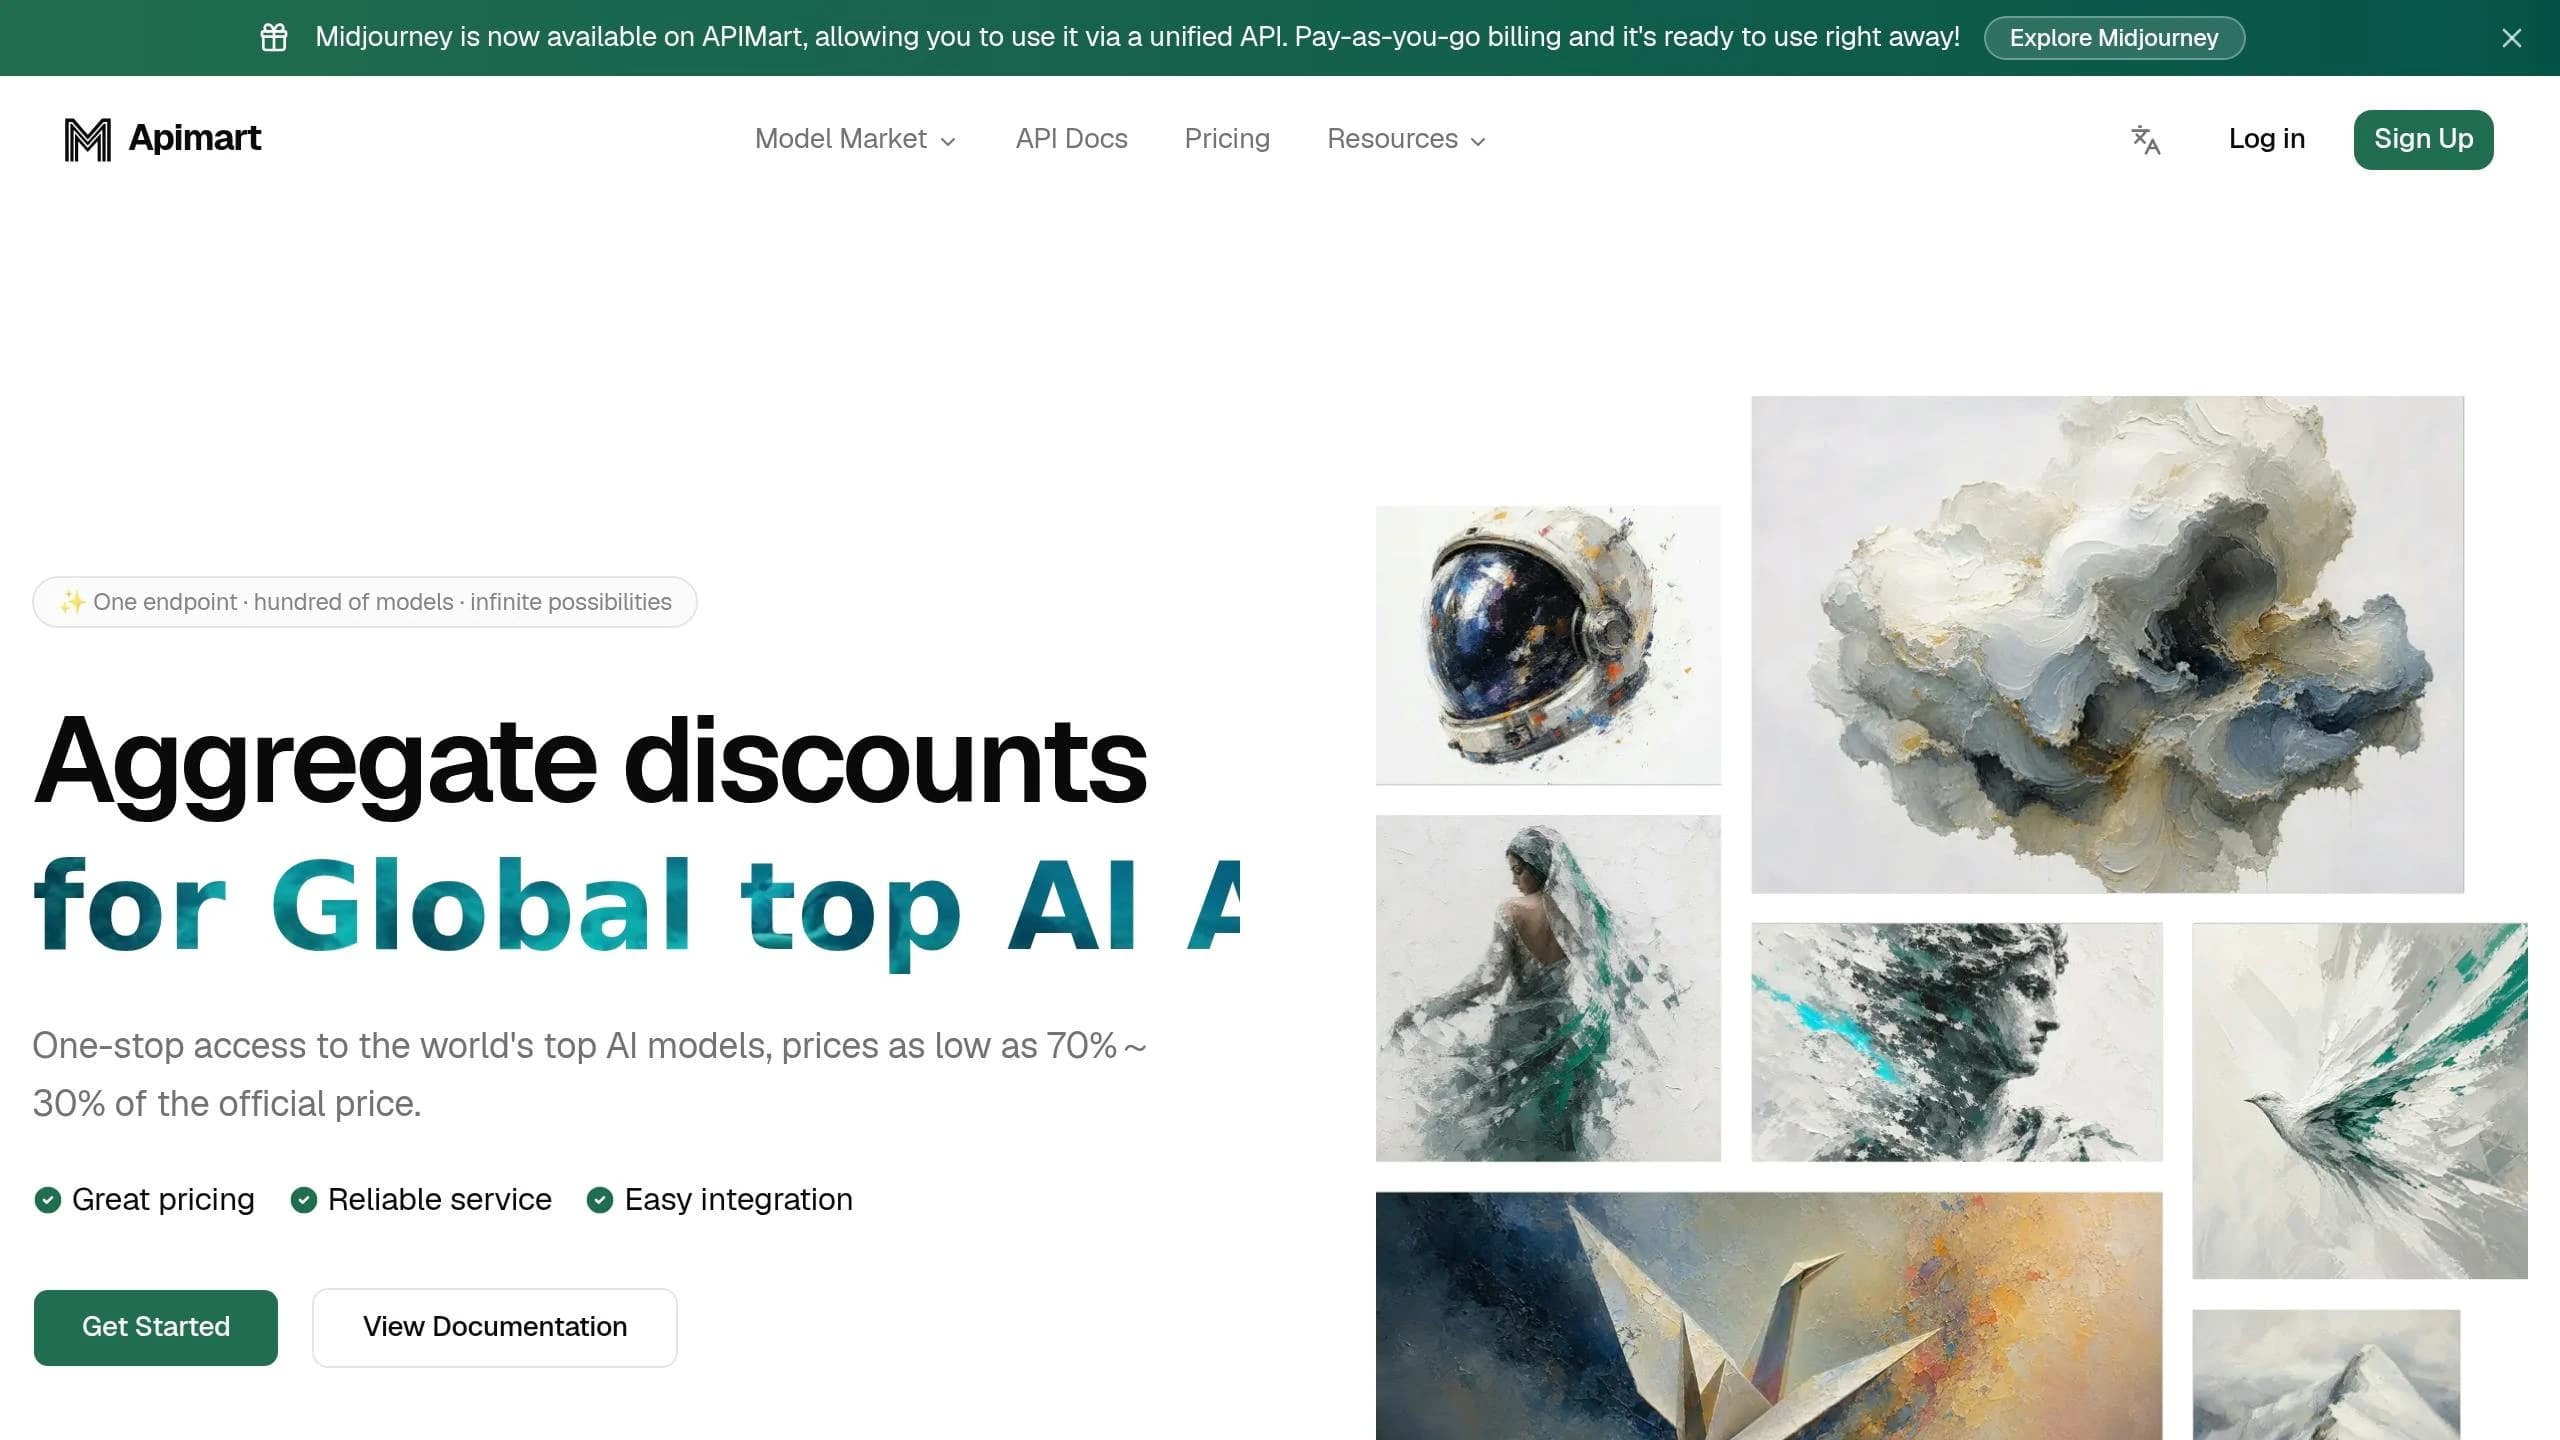
After you pick a model, you can send jobs through APIMart with one API key. First, create an APIMart account and generate your key from the API key management page in the dashboard [2][3].
Send each request with a Bearer token in the Authorization header:
Authorization: Bearer YOUR_API_KEY
For storage, keep keys in environment variables or a secret manager like AWS Secrets Manager or GCP Secret Manager. It also helps to use separate keys for development, staging, and production. If a key gets exposed, rotate it right away. Do the same on a set schedule. And when you log requests, save only the task_id - never the token itself [5].
Finding Vidu models, pricing, and input schema in APIMart
Once you're signed in, check the catalog before you send anything. That's where you can confirm model names, supported inputs, and current pricing. In APIMart's catalog, Vidu models are listed under Video Generation. You can also find other high-performance models like MiniMax-Hailuo-02 in the same category. Use that page to compare input schema, resolution, and per-second cost across MoE, Q3 Pro, and Q3 Turbo [2][3].
The main fields to watch are:
modelpromptdurationresolutionaspect_ratio
For text-to-video jobs, use aspect_ratio. For image-based jobs, the system uses the source image's ratio instead [2]. Text prompts are limited to 2,000 characters [2][3].
Endpoints, request structure, and async job handling
After you choose the model, submit the generation request and track the async job with the returned task_id. Send a POST request to https://api.apimart.ai/v1/videos/generations, then poll job status with GET https://api.apimart.ai/v1/tasks/{task_id} [2][5].
Jobs move through these states:
submittedqueueingprocessingsuccessorfailed
If you want APIMart to notify your app when the job is done, add callback_url and receive the result by webhook [5]. Once the job reaches success, download the file right away. From there, you can map the request fields to either a text-to-video flow or a reference-based flow.
Step-by-Step Integration for Text-to-Video and Reference-Based Video
Basic text-to-video flow with model selection
After you pick a model from the catalog, the text-to-video flow is pretty simple. Send your API key from the server side in the Authorization header as Bearer {your_api_key}.
Here’s a minimal payload for a text-to-video job with viduq3-pro:
{
  "model": "viduq3-pro",
  "prompt": "A red fox running through a snowy forest at dusk, cinematic slow motion",
  "duration": 8,
  "resolution": "720p",
  "aspect_ratio": "16:9",
  "audio": true
}
The response includes a task_id and a status like submitted, queueing, or processing. After that, you can either poll GET /v1/tasks/{task_id} with the returned task_id, or pass a callback_url in the request so the platform can notify your app when the job reaches success or failed [1][7][10]. If you want to switch to viduq3-turbo, you mostly just change the model field.
The async pattern stays the same across modes. What changes are the input fields.
Adding image or reference inputs and advanced controls
For image-to-video, pass one image URL in the image_urls array. Use 0 images for text-to-video, 1 for image-to-video, and 2 for first-last-frame mode [2]. In image-based modes, the output aspect ratio comes from the source image, so you can leave out aspect_ratio [2]. If you upload files directly instead of using URLs, keep each image in PNG, JPEG, or WebP format, under 50 MB, and keep the total HTTP body under 20 MB [9][8].
For reference-based generation, use the /reference2video endpoint with a subjects array. Define each subject with a name and its images, then call it in the prompt with @subjectname. Q3 models allow up to 7 reference images or text descriptions in the subjects feature [6]. If you’re using first-last frame mode, keep both images close in aspect ratio, ideally within a 0.8 to 1.25 ratio, to reduce failures [8]. When faces or hands are involved, keep motion prompts subtle to cut down on distortion artifacts [5].
The table below shows the main parameters across both flows:
| Parameter | Type | Valid Range / Options | Applies To |
|---|---|---|---|
model | String | viduq3-pro, viduq3-turbo | All |
prompt | String | Max 2,000 characters | All (required for text-to-video; optional for image-to-video) |
duration | Integer | 1–16s | All |
resolution | String | 540p, 720p, 1080p | All |
aspect_ratio | String | 16:9, 9:16, 4:3, 3:4, 1:1 | Text-to-video only |
audio | Boolean | true, false | Default true for Q3 |
seed | Integer | -1 to 4,294,967,295 | All |
off_peak | Boolean | true, false | All |
callback_url | String | Optional webhook URL for status updates | All |
Set a fixed seed while testing if you want the same visual result across runs [2][9]. For batch jobs that aren’t urgent, set off_peak to true. Those tasks are usually completed within 48 hours and use fewer credits [1][6].
Tracking usage, cost, and production reliability
Once your request is working, the next job is keeping cost and reliability under control in production.
Log the task_id and timestamp for every request. That gives you a safe way to debug without storing sensitive credentials [5]. It also helps to track queue time and generation time separately, so you can tell the difference between platform delay and model latency.
For cost estimation, Vidu Q3 Pro at 720p costs about $0.12 per second on APIMart, and Q3 Turbo costs about $0.048 per second [3]. Set automated alerts at 50%, 80%, and 100% of your monthly budget cap so spending doesn’t get away from you [5].
Retries matter too. On 5xx errors, use exponential backoff: retry at 2 seconds, then 5 seconds, then 15 seconds before showing an error to the user [5]. Vidu Q3 series models come with a 99.9% SLA for production workloads [3], but short-lived failures still happen, so retries should be part of any shipping build.
Model Selection Checklist and Key Takeaways
Use-case checklist for developers, creators, and product teams
Pick based on three things: prompt complexity, speed, and output quality. The table below turns the model comparison into a practical shipping choice.
| Scenario | Best Model | Why |
|---|---|---|
| Multi-scene ads, storyboards, complex prompts | Vidu MoE (viduq3-mix) | Best for instruction-heavy prompts and smart scene transitions |
| Final brand promos, polished product visuals | Vidu Q3 Pro (viduq3-pro) | High-fidelity, cinematic 1080p output; ~$0.12/sec at 720p [3] |
| Rapid prototyping, drafts, and short-form clips | Vidu Q3 Turbo (viduq3-turbo) | Best for fast, high-volume iteration; ~$0.048/sec at 720p [3] |
| Character consistency across references | Vidu Q3 Pro (viduq3-pro) | Supports up to 7 reference images and requires image input [6][8] |
Once you’ve picked a row, keep the same request schema from the integration section. In plain English: start ideas in Q3 Turbo, then move the final 1080p render to Q3 Pro. It’s a simple workflow, and it helps you move fast without spending more than you need to.
For clips where motion fidelity matters most, aim for 5–10 seconds instead of stretching to the 16-second maximum. Shorter clips often give you tighter motion and fewer headaches.
Key points to remember before shipping
MoE is the pick for complex, multi-scene logic. Q3 Pro gives you high-fidelity, cinematic 1080p output [3]. Q3 Turbo is the lower-cost option at $0.048/sec at 720p [3].
On APIMart, switching between these models is just a single model parameter change. Everything else in the request stays the same [3]. That means you can test one model, swap to another, and keep your integration work steady.
Use the same async flow each time:
- Submit the request
- Capture
task_id - Poll for status or use
callback_url
Also, download generated videos soon after they’re ready. Output links expire after 24 hours [3][11].
FAQs
Which Vidu model should I start with?
Start with the model that fits your needs for speed, audio, and visual control.
- viduq3-pro: best for audio-visual sync and shot segmentation
- viduq3-turbo: faster generation than the pro version
- viduq1 or viduq2: solid picks for stable video production and reliable camera movement
How do I track a video job after submitting it?
You can track your video generation task in two ways.
For production use, the best option is to include a callback_url in your initial request. When you do that, the Vidu API sends task updates and result metadata straight to your URL automatically. That means you don't need to keep checking the task status yourself.
The other option is to poll the status query API with the task_id you get after submission. Once the task state changes to success, the response will include the video download URL and other related metadata.
What inputs and limits should I know before integrating?
Before you integrate the Vidu API, make sure your inputs stay within these limits:
- Images: PNG, JPEG, JPG, or WebP only; each file must be under 50 MB and at least 128×128 pixels
- Total HTTP request body: 20 MB max
- Text prompts: up to 5,000 characters
- Payload passthrough data: up to 1,048,576 characters
Duration limits depend on the model you use. Q3 supports 1–16 seconds, Q2 supports 1–10 seconds, and Q1 supports 5 seconds.
Also, keep your API keys secure. Don’t expose them in client-side code. Send requests through a server-side intermediary instead.