How to Use Kling V3 Omni - Full AI Video Tutorial
Step-by-step Kling V3 Omni tutorial - set up APIMart, get an API key, build reusable elements, write shot-by-shot prompts and export cinematic AI videos.
Kling V3 Omni is an advanced AI video generation tool designed to simplify creating professional-grade videos. Available on APIMart, it integrates text, images, and audio into a single workflow, producing synchronized video and sound with cinematic features. Key highlights include:
- AI Director: Automates up to six camera cuts in 15-second clips.
- Character Identity 3.0: Maintains consistent character visuals across scenes.
- Multi-Language Support: Generates native audio in five languages (English, Chinese, Japanese, Korean, Spanish).
- Flexible Resolutions: Supports 720P to 4K with aspect ratios like 16:9, 9:16, and 1:1.
- Pricing: APIMart offers competitive rates starting at $0.0672/second for 720P, 20% lower than official prices.
The process involves setting up an APIMart account, retrieving an API key, preparing inputs (text, images, and videos), and using Kling's tag-based prompts to create and refine videos. With features like reusable elements, shot-by-shot prompts, and multi-scene capabilities, Kling V3 Omni streamlines video production for creators and developers. For those seeking alternatives, MiniMax-Hailuo-2.3 also offers high-consistency video generation.
Head to apimart.ai to start creating cinematic-quality videos today.
Access and Setup in APIMart
Setting Up an APIMart Account
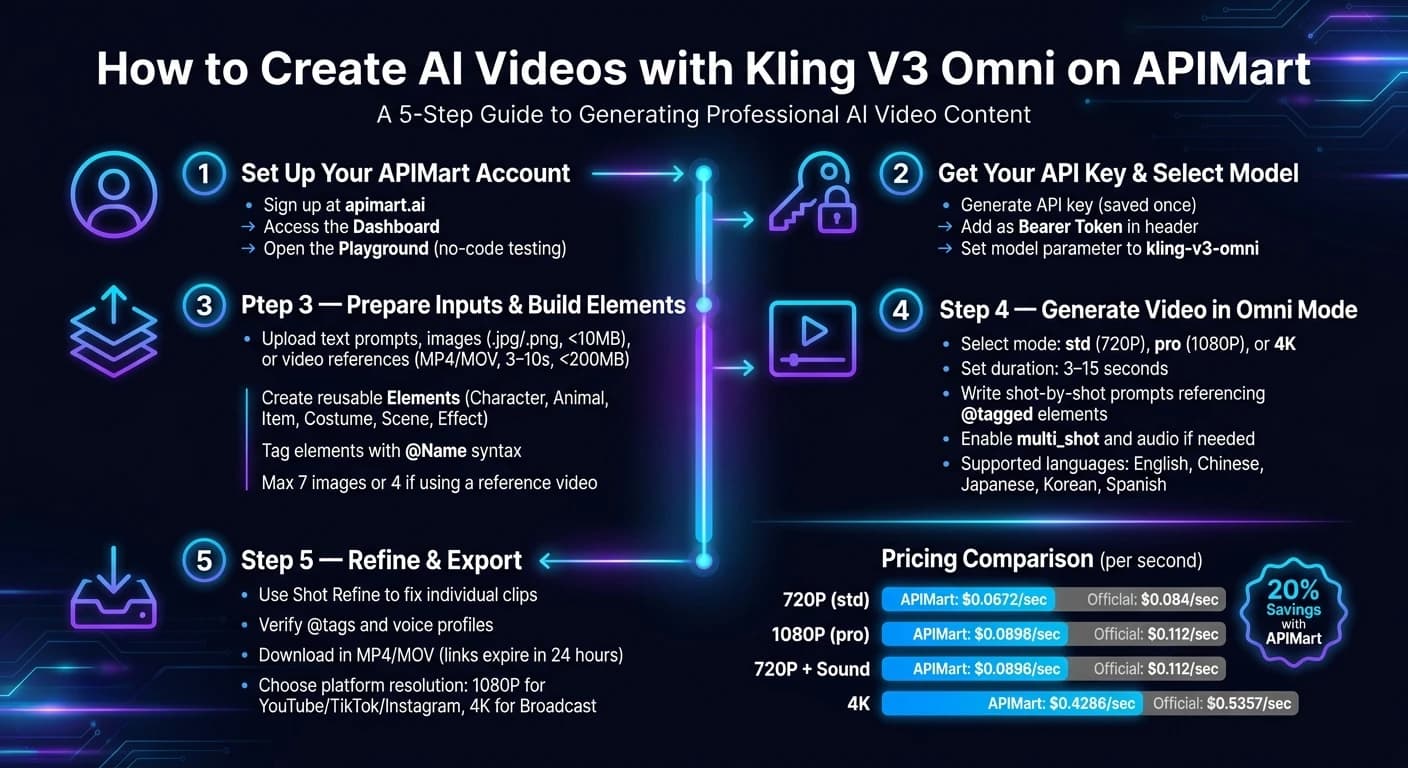
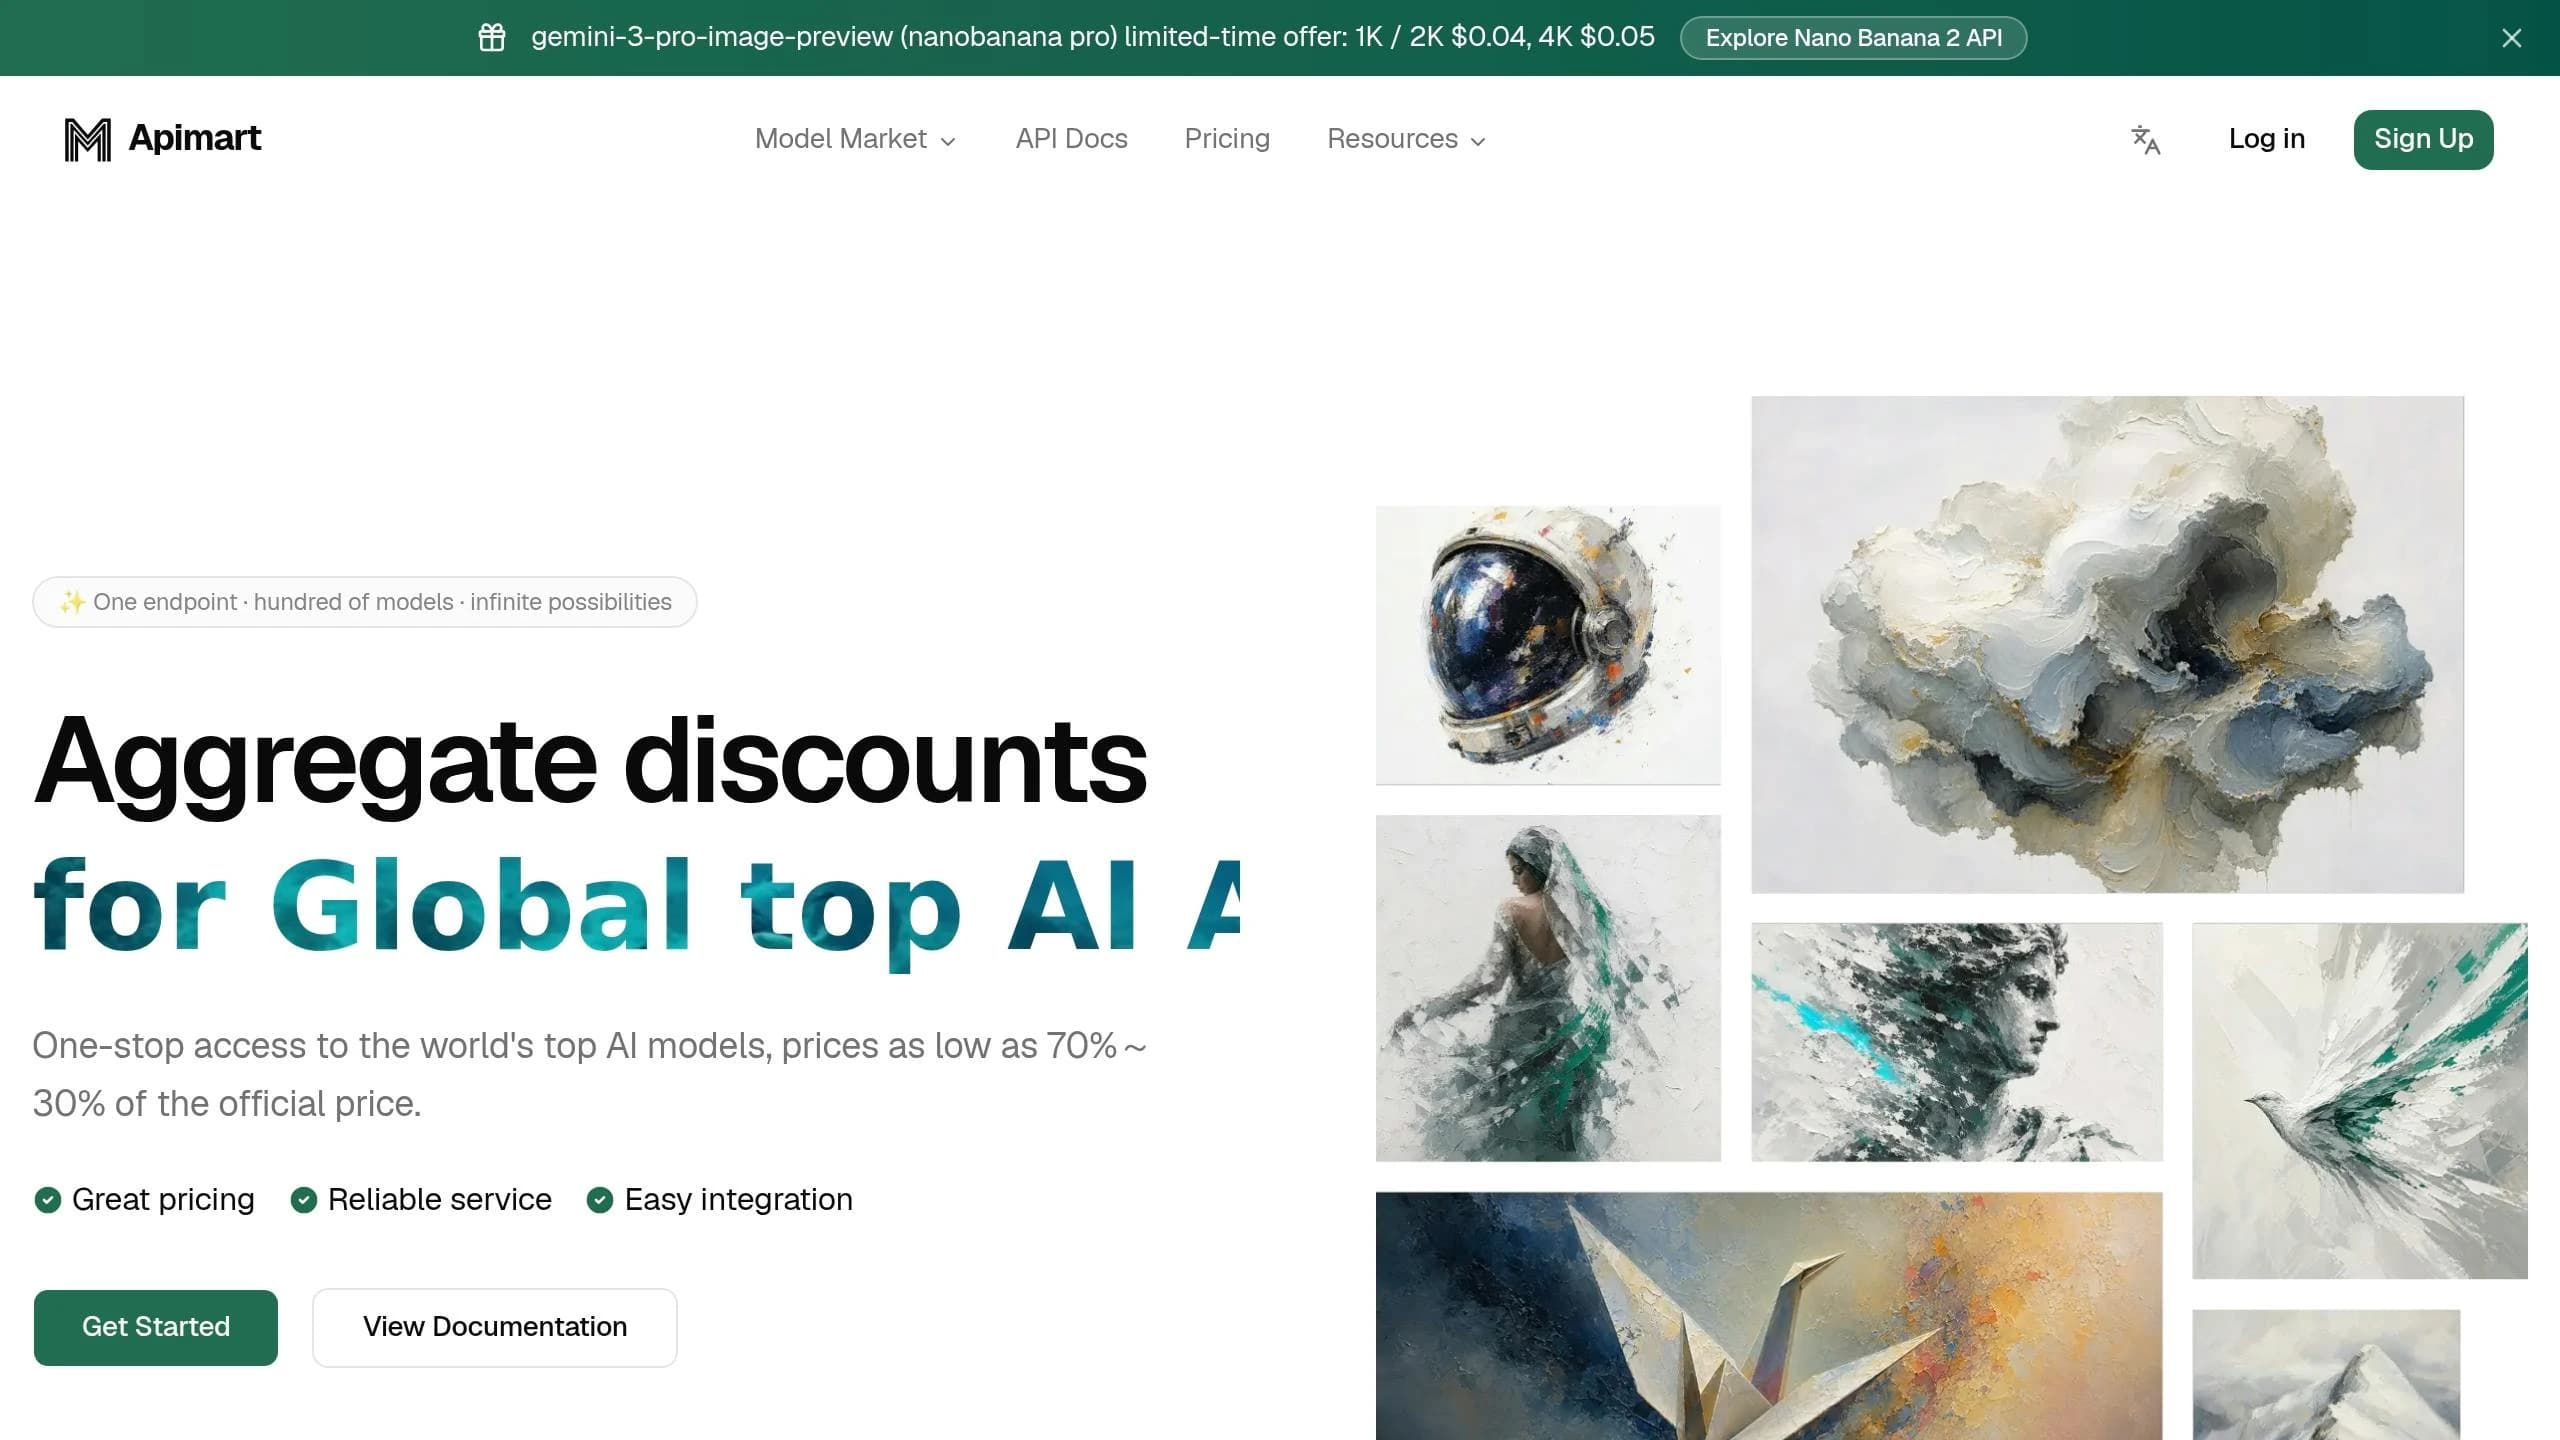
Getting started is straightforward. Head over to apimart.ai and sign up for a free account. Once you're logged in, you'll see the dashboard featuring the model catalog and the APIMart Playground. The Playground is a no-code testing space where you can explore Kling V3 Omni's capabilities. This setup ensures you're ready for managing API keys and selecting models in the next steps.
Getting Your API Key and Selecting the Model
After logging in, go to the API Key Management section on your dashboard and generate a new API key. Make sure to save it securely, as it will only be displayed once.
To use the key, include it in your API request header as a Bearer Token, like this:
Authorization: Bearer YOUR_API_KEY.
If you're working with Kling V3 Omni, you'll need to specify the model parameter in your API calls as kling-v3-omni. This ensures your requests are routed through its advanced multi-modal system, which supports text-to-video, image-to-video, and combined inputs.
"kling-v3-omni is a versatile omni model supporting text-to-video, image-to-video, and multi-modal inputs in a single unified architecture." - APIMart
For added security, store your API key in an environment variable rather than embedding it directly in your code.
Once you've set up your key and chosen the model, check the pricing details to plan your video projects effectively.
Pricing and Video Length Limits
Kling V3 Omni's pricing is based on the length of the generated video and the selected resolution. APIMart offers rates that are 20% lower than the official prices [5]:
| Resolution | APIMart Price | Official Price |
|---|---|---|
720P (std) | $0.0672/sec | $0.084/sec |
1080P (pro) | $0.0896/sec | $0.112/sec |
| 720P + Sound | $0.0896/sec | $0.112/sec |
| 4K | $0.42856/sec | $0.5357/sec |
The video length can range from 3 to 15 seconds, with 5 seconds being the default. For instance, creating a 10-second clip at 1080P would cost approximately $0.90. If you're just experimenting, start with std (720P) to minimize costs, and then switch to pro or 4K for polished, final versions.
With your account set up, API key secured, and pricing understood, you're ready to start preparing inputs and crafting your video projects.
Prepare Inputs and Build Elements
Supported Input Types
Once you’ve got your account and API key ready, the next step is to prepare the inputs. Kling V3 Omni works with several core input types, such as text prompts, image references, persistent elements (both image-based and video-based), and scene references. Each input type has its own purpose:
| Input Type | Best Use Case | Reference Syntax |
|---|---|---|
| Text Prompt | Generating content or describing actions | N/A |
| Image Reference | Setting visual style, lighting, or a starting frame | <<<image_1>>> or @Image1 |
| Element (Image-based) | Ensuring consistency for characters or products | <<<element_1>>> or @Element1 |
| Element (Video-based) | Locking in character visuals and native voice | @Element1 |
| Scene Reference | Keeping the environment or background stable | @Image |
By default, any image you upload without tagging gets auto-labeled as image_1 [1]. However, using explicit tags like @Image1 is a smarter move, especially when combining multiple references in a single project. You can include up to 7 images or elements in one generation. If you add a reference video, the limit drops to 4 [1][6].
Creating Reusable Elements
Elements are a standout feature of Kling V3 Omni, designed to maintain consistency by saving visual traits for characters, products, or scenes. This way, you don’t need to re-describe them every time [10][7].
"Subject binding AI is a technology that anchors specific visual characteristics of a character or object to the generation pipeline." - Kling AI [10]
For an image-based element, upload one front-facing photo along with 1–3 reference images showing the subject from different angles (side, back, or close-up details). For video-based elements, a 3–8 second clip will allow the model to capture both appearance and voice [2][7]. Once you’ve saved an element, reference it in your prompt using a short tag like @Grace or @HeroCar. Make sure the names are short and distinct to avoid confusion [7].
Kling V3 Omni organizes elements into six categories: Character, Animal, Item, Costume, Scene, and Effect. Each category is linked to a specific tag ID (o_102 through o_107) [3]. This setup helps you build and manage a production library before you start generating content.
Tips for Preparing Inputs
Here are some key guidelines to keep in mind for your input files:
- Image Files: Use .jpg, .jpeg, or .png formats under 10MB. The resolution should be at least 300px, with an aspect ratio between 1:2.5 and 2.5:1 [1][6].
- Video References: Stick to MP4 or MOV files, between 3–10 seconds long and under 200MB [1][6].
Be specific when describing your inputs. Use clear, detailed language to define lighting, camera angles, and subject actions. For multi-shot videos, leave the main prompt box empty and instead use the Multi-Prompt JSON structure to specify each shot’s details, including duration and framing [9]. If you want to activate the model’s physics simulation for realistic effects, include terms like “realistic gravity” or “fluid dynamics” in your prompt [3].
For testing, it’s best to render drafts in 720p (audio off, 6 credits/sec). Once satisfied, finalize in 1080p with audio enabled (12 credits/sec) [7].
With your inputs and elements ready, you’re all set to start creating videos in Omni mode. You can also explore other advanced tools like Grok Imagine video for high-quality text-to-video generation.
Deep Dive into Cinematic AI Films with Kling 3.0 & 3.0 Omni | Tutorial
Create a Video in Omni Mode
With your inputs ready, it's time to generate your video using Omni mode.
Selecting Omni Mode
Begin by selecting kling-v3-omni in the APIMart interface. This model provides access to all Omni features, including multi-shot sequencing, element binding, and native audio capabilities.
Next, enable only the sub-modes you need. For multi-scene videos, turn on Multi-Shot. If you prefer to define each shot manually, opt for Custom Multi-Shot. To incorporate the character elements you prepared earlier, use the elements parameter or the "Bind Subject" tool. This step integrates your elements seamlessly into the video. For synchronized dialogue and sound effects, set audio to true. Choose features based on your project requirements to keep the process efficient.
Writing Effective Prompts
Craft your prompts in a shot-by-shot format, referencing your uploaded elements and resources for each scene. Here's an example:
Shot 1 (4s): Medium close-up. @Grace enters the coffee shop, looks around. Slow dolly push-in.
Shot 2 (3s): Wide shot. @Grace sits down, places her bag on the table. Static camera.
Each shot should specify the framing, the tagged elements, the action or dialogue, and any camera movement. The model is designed to understand professional cinematography terms, enabling it to handle advanced techniques like orbital shots, tracking shots, and crane movements. Dialogue can be written directly into the shot, and the model will sync lip movements and voice output. It supports five languages: Chinese, English, Japanese, Korean, and Spanish [2][4]. You can also define the tone, such as "calm" or "urgent", to adjust both voice and facial expressions [3].
"The model understands the language of cinematography, allowing it to execute complex techniques like orbital shots, tracking shots, and crane movements." - Kling AI [3]
For added realism, include terms like "realistic gravity" or "fluid dynamics" to activate the model's physics simulation for natural motion [3].
Adjusting Video Parameters
Before submitting, fine-tune your output settings. Key parameters include:
| Parameter | Options | Notes |
|---|---|---|
mode | std, pro, 4k | Choose between 720P, 1080P, or 4K Ultra HD |
duration | 3–15 (integer) | Enter as a plain number, no quotes |
aspect_ratio | 16:9, 9:16, 1:1 | Select portrait for social or landscape for cinematic |
audio | true, false | Enables synchronized sound |
multi_shot | true, false | Activates multi-scene generation |
For initial tests, use mode: std and audio: false. This setup, at 6 credits per second, allows you to check movement, composition, and element behavior without consuming too many credits. Once you're satisfied, switch to pro mode with audio: true (12 credits per second) for the final version [2][7].
Keep in mind that if you upload an image as a reference, its dimensions might override the aspect_ratio setting [1]. If the frame shape is critical, ensure your source image has the desired dimensions.
Review your output carefully and make adjustments as needed to achieve the desired result.
Refine and Export Your Video
After creating your video in Omni mode, it’s time to put the finishing touches on your project by refining specific areas and exporting the final version.
Reviewing and Adjusting Your Output
Notice something off in a specific shot? Use the Shot Refine feature to fix just that section. This approach is the most efficient way to save credits - no need to regenerate an entire 15-second video when only a 3-second clip needs tweaking [7].
For issues with physics, try adding keywords like "realistic gravity" or "fluid dynamics" to improve the affected shot [3]. If a character looks inconsistent, you can strengthen the model's spatial understanding by updating the Element with additional reference angles (e.g., front, side, and 45-degree views) [11].
Once you’ve refined the problematic areas, shift your focus to the overall visual and audio flow of the video, similar to the cinematic control offered by Google's Veo 3.1.
Ensuring Consistency and Quality
The Character Identity 3.0 system automatically handles most consistency issues by using skeletal mapping and visual trait extraction. However, it still relies on clean inputs. Double-check that each character is properly @tagged in every shot prompt [7][4].
To maintain voice consistency, make sure a specific voice profile is bound to the character Element before generating audio. Afterward, review the lip-sync accuracy, especially for non-English dialogue. While the system supports languages like Chinese, English, Japanese, Korean, and Spanish, regional dialects may occasionally cause slight sync issues [2].
"kling-v3's cinematic quality is incredible! The 15-second duration option in kling-v3 gives us so much more creative freedom for storytelling." - Sarah Johnson, Creative Director [5]
Need to swap a character or change an environment in an already-approved clip? The Kling 3.0 Omni Edit feature allows you to make these adjustments without regenerating the entire scene, preserving the original motion and timing [7].
Once you’ve confirmed that everything is consistent, you’re ready to export your video.
Exporting the Final Video
Choose the resolution that aligns with your delivery platform. Here’s a quick guide to help you pick the right settings:
| Platform | Resolution | Aspect Ratio | Audio | APIMart Price (approx./sec) |
|---|---|---|---|---|
| YouTube / Cinematic | 1080p | 16:9 | On | $0.1120 [5] |
| TikTok / Reels | 1080p | 9:16 | On | $0.1120 [5] |
| Instagram Feed | 1080p | 1:1 | On | $0.1120 [5] |
| Professional / Broadcast | 4K | 16:9 | On | $0.4285 [5] |
Videos are delivered in MP4 or MOV format [1]. Keep in mind that API-generated video links expire after 24 hours, so make sure to download your files promptly [1][5]. The audio is synthesized at 48kHz, ensuring the final file is ready for broadcast without requiring additional sound processing [12].
If you’re planning to use the video commercially - for monetized YouTube channels, client projects, or brand campaigns - make sure you’re subscribed to a paid tier. This ensures you retain full ownership and commercial rights to your output [12].
Conclusion
We've covered everything you need to know to create a polished, export-ready video using Kling V3 Omni on APIMart. The process is straightforward: set up your APIMart account, grab your API key, integrate your saved Elements, write detailed shot-by-shot prompts, and generate multiple cinematic cuts - all within a single 15-second production cycle.
To make the most of your credits, start by drafting in 720p resolution ($0.0672/sec) to test motion and composition. Once you're satisfied, finalize your project in 1080p or even 4K for the best quality.
"Kling 3.0 Omni turns AI video from a 'roll the dice' process into a reference-driven system that understands characters, environments, and props as reusable elements." - Invideo[8]
What makes Kling V3 Omni stand out is its seamless workflow. It combines text, image, audio, and video into one cohesive process - no need to juggle multiple tools or stitch things together afterward. Plus, APIMart offers a 99.9% SLA[5] and 20% cost savings compared to Kling’s standard pricing[5], making it a smart choice whether you're building a professional pipeline or simply exploring AI video creation for the first time.
Ready to get started? Head over to apimart.ai, generate your API key, and bring your video ideas to life.
FAQs
What inputs do I need to generate a video with Kling V3 Omni?
To produce a video using Kling V3 Omni, start by supplying a model identifier and a text prompt or storyboard. For projects involving multiple shots, include a detailed prompt for each shot to maintain consistency.
You can also add optional inputs to refine your video, such as:
- Reference assets: These could include images, style guides, or other visual materials to guide the video's look and feel.
- Duration: Specify a length between 3 and 15 seconds.
- Aspect ratio: Choose from 16:9, 9:16, or 1:1, depending on your platform or audience preferences.
- Quality mode: Opt for either standard or professional quality based on your project's requirements.
- Synchronized audio: Include this if your video needs to align visuals with sound.
Make sure all inputs are tailored to the goals and specifics of your project for the best results.
How do I keep the same character consistent across multiple shots?
To keep character consistency in Kling V3 Omni, take advantage of the Subject Binding feature. Start by uploading 2–4 high-resolution photos of the character, capturing different angles like front, side, and 45-degree views. These images will be used to create an Element. When crafting your prompt, reference this Element using the @ symbol (e.g., @element1). For smoother transitions and to maintain consistency in facial structure, hairstyle, and clothing, make sure to enable Multi-Shot mode.
What settings should I use to balance quality and cost?
To strike a balance between quality and cost, go with standard mode (std) for 720p output. This option works well for drafts or when you're aiming for a budget-friendly production. If you're looking for higher quality, especially for final deliverables, professional mode (pro) at 1080p is a better choice. For the best possible fidelity, consider 4K mode, but keep in mind that it comes with a higher price tag.
Also, remember that including native audio in your clips will increase the per-second cost compared to silent footage.
Related Blog Posts
Choose the model you want in the model marketplace
Try chat, image and video models in the APIMart model marketplace, and experience model capabilities quickly with one unified API.